A garage door installation might seem straightforward, but it involves precision and expertise to ensure safety, functionality, and long-term durability. Whether upgrading your current garage door or building a new garage, understanding the installation process is crucial. Here, we will take you through each step of the garage door installation process so you can make informed decisions about your next home improvement project.
Assessing Your Needs and Selecting the Right Garage Door
Before diving into the installation process, the first step is selecting the right garage door for your home. There are various types of garage doors available, including:
Sectional Garage Doors
These doors are the most commonly used type for residential garages due to their reliability and ease of use. They consist of multiple horizontal panels hinged together, allowing for smooth operation when opening or closing. The panels move vertically along tracks and then horizontally to rest parallel to the ceiling, maximizing available space inside and outside the garage.
Roll-Up Doors
Typically used in commercial environments, roll-up garage doors are designed for high-traffic areas and offer a compact solution. These doors are made of metal slats that coil tightly around a drum when the door is opened, making them ideal for areas with limited ceiling space. Roll-up doors are known for their durability, security features, and ability to provide high protection against weather and intruders.
Swing-Out and Tilt-Up Doors
Swing-out and tilt-up garage doors offer a unique, vintage look that can enhance the curb appeal of certain homes or buildings. Swing-out doors are hinged on the sides and open outward like traditional doors, while tilt-up doors are single panels that tilt outward and upwards. These doors require additional clearance space in front of and inside the garage to operate fully, which can be a consideration in smaller spaces.
When selecting your garage door, consider the material (wood, steel, aluminum, or fiberglass), insulation, and style. Also, consider the functionality you need, such as a manual or automatic door opener and security features. Working with a professional installer can help you navigate these choices to match your home’s aesthetic and practical needs.
Preparing the Garage for Installation
Once you’ve chosen your garage door, the next step is preparing the space for installation. Proper preparation is key to ensuring a smooth process and preventing potential issues.
Clear the Area
Ensure the garage is free from debris and personal items to prepare for a smooth installation process. Removing clutter gives installers enough room to work efficiently and maneuver the door panels during the setup. Adequate workspace reduces the risk of damage to the door and personal belongings.
Check the Structure
The garage’s frame and door opening should be in good condition to support a successful installation. If left unresolved, issues like damaged walls or a misaligned door opening can compromise the door’s fit and functionality. Addressing these problems beforehand ensures the new door operates smoothly and lasts longer.
Power Suppl
If the installation includes an automatic opener, ensure a power outlet is readily available near the garage door. This is essential for the installer to connect the opener and test its functionality during the setup. Verifying the outlet’s accessibility ensures the system operates as expected without delays.

The Garage Door Installation Process
Installing a garage door is best left to the professionals, as it involves heavy materials, electrical work, and mechanical systems that must be handled carefully. Below are the key steps involved in the installation:
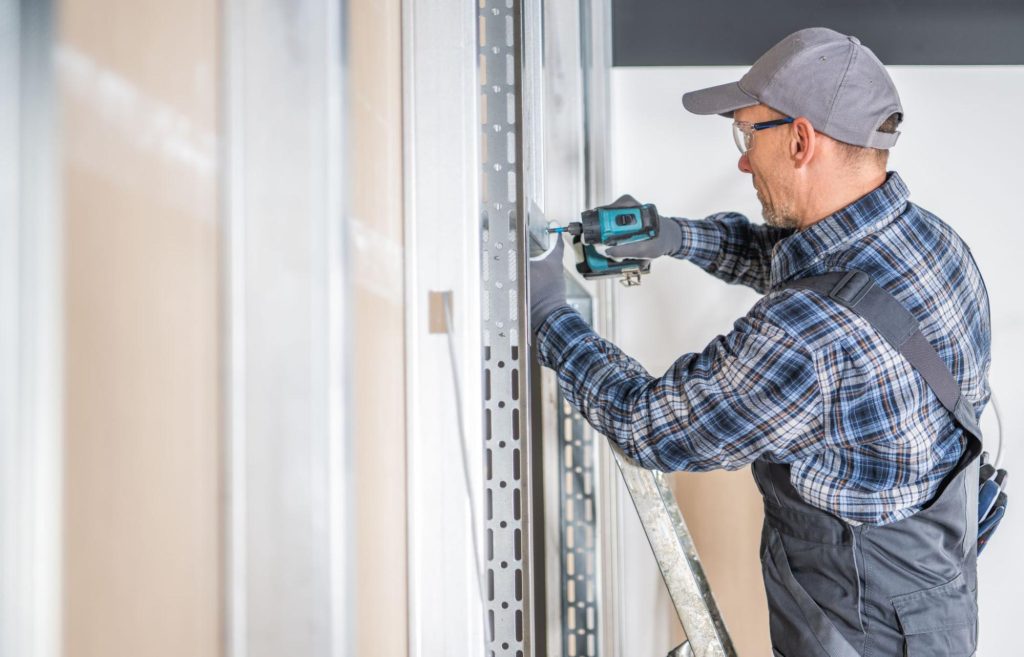
Step 1: Installing the Tracks and Hinges
The first part of the installation involves setting up the tracks for the door to move along. The installer will attach vertical tracks to each side of the door frame, ensuring they are perfectly aligned. Horizontal tracks are then attached above the door opening. The tracks must be level to ensure smooth operation of the door. Next, the hinges and rollers are installed on the door sections. The rollers will move smoothly through the tracks while the hinges connect the door sections.
Step 2: Assembling the Door Sections
The installer begins by assembling the individual panels of the sectional door, ensuring each piece is aligned for proper functionality. Each section is carefully positioned along the tracks to guarantee smooth movement during operation. Bolts and hinges are used to securely fasten the panels, creating a stable and durable structure. This step is crucial for the door’s smooth performance and long-term reliability.
Step 3: Installing the Spring System
The garage door’s spring system ensures the door operates smoothly. Two main types are commonly used. Torsion springs, mounted above the door, lift it by twisting, while extension springs are located above the horizontal tracks and extend to provide the necessary lifting power. Both systems are essential for balancing the door’s weight and facilitating seamless operation. The installer will carefully install the spring system to ensure it is balanced and properly tensioned. Misadjusted springs can cause the door to become imbalanced, leading to premature wear.
Step 4: Installing the Garage Door Opener
If you’re adding an automatic opener, this is when it will be installed. The opener is typically mounted on the ceiling of the garage. The installer will connect the opener to the door with a chain or belt drive, ensuring that the door opens and closes without difficulty. Once the opener is installed, the installer will run wiring for the remote control and safety sensors. The sensors are important for ensuring that the door stops if there is an obstruction in its path, preventing accidents.
Step 5: Final Adjustments and Testing
Once everything is in place, the installer will make final adjustments to the door’s balance and alignment. The door must open and close smoothly, without any resistance or noise. The spring system will be adjusted to ensure the door is balanced, which helps reduce wear and tear on the opener. The automatic opener will be tested to ensure it functions properly, including testing the safety sensors. The installer will also check the remote control and provide instructions for door operation.
Final Considerations and Maintenance Tips for Garage Door Installation
Once the garage door installation is complete, you should be aware of some key maintenance tips to keep your door operating smoothly:
Lubricate Moving Parts
Applying lubrication to the tracks, rollers, and springs regularly helps maintain the garage door’s smooth operation. Proper lubrication prevents squeaks and reduces friction, minimizing wear and tear on the moving components. This maintenance step extends the door’s life and ensures quieter operation over time.
Check the Balance
Periodically checking the door’s balance ensures it opens and closes smoothly without straining the opener. A properly balanced door will remain in place when partially opened, indicating that the springs are functioning correctly. Professional adjustment may be necessary to avoid further mechanical issues if the door seems unbalanced.
Inspect the Safety Sensors
Testing the safety sensors regularly helps ensure they function correctly to prevent accidents or injuries. Faulty sensors may cause the door to malfunction, potentially reversing unexpectedly or failing to stop when an object is detected. Keeping these sensors clean and adequately aligned is essential for maintaining a safe and efficient garage door system.
Clean the Door
Cleaning the garage door with a mild detergent and water removes accumulated dirt, debris, and grime that could affect its appearance and functionality. Regular cleaning prevents the buildup of harmful substances that may cause rust or discoloration, particularly for metal doors. This simple maintenance step helps preserve the door’s condition and enhances the garage’s overall look.
Why Professional Garage Door Installation is Essential
While DIY garage door kits are available, professional installation is recommended for safety and efficiency. Installing a garage door involves handling heavy components and complex mechanical systems that require specialized knowledge and tools. Additionally, professional installers can ensure that the door is properly balanced and aligned, reducing the risk of malfunction and prolonging the door’s lifespan.

Perfect Your Property With a New Garage Door
Installing a garage door is a multifaceted process that involves careful planning, proper equipment, and expert installation. Whether replacing an old door or installing a new one, understanding the process can help you make informed decisions about the project. If you’re ready to upgrade your garage, contact a professional installer to ensure the job is done right the first time. With proper installation and regular maintenance, your garage door will provide reliable service for many years.
Visit our All American Door LLC blog to learn more about our garage door repair and installation services.